Contents
If your headlight beams illuminate more of the road shoulder than the road ahead—or more of the oncoming lane than your own, your headlamps might not be mounted properly, or the lamp may be damaged. Another sign of a headlight alignment issue is if other drivers are flashing their brights at you, even though you believe your headlights are only hitting the road (not their eyes).
Shop now for headlight assembliesWith or without those issues, a headlight adjustment check is in order in these circumstances:
- After hitting a big bump or obstacle in the road, and the headlights aren’t lighting the road as expected
- When you’re replacing headlight assemblies or headlight buckets
- If you’ve altered the ride height during a vehicle modification
A 2008 National Highway Traffic Safety Administration (NHTSA) study found that 62 percent of vehicles tested had at least one misaligned headlight.
How Should You Adjust the Headlights?
Start by establishing a baseline. The first step is to see where your headlights are currently aiming. Find a wall that can be marked with masking tape—and an open space that allows you to park your car two feet from the wall and then back up 25 feet. The best time to adjust headlights is late evening when the beams are most visible on the target, or during the day inside a darkened shop.
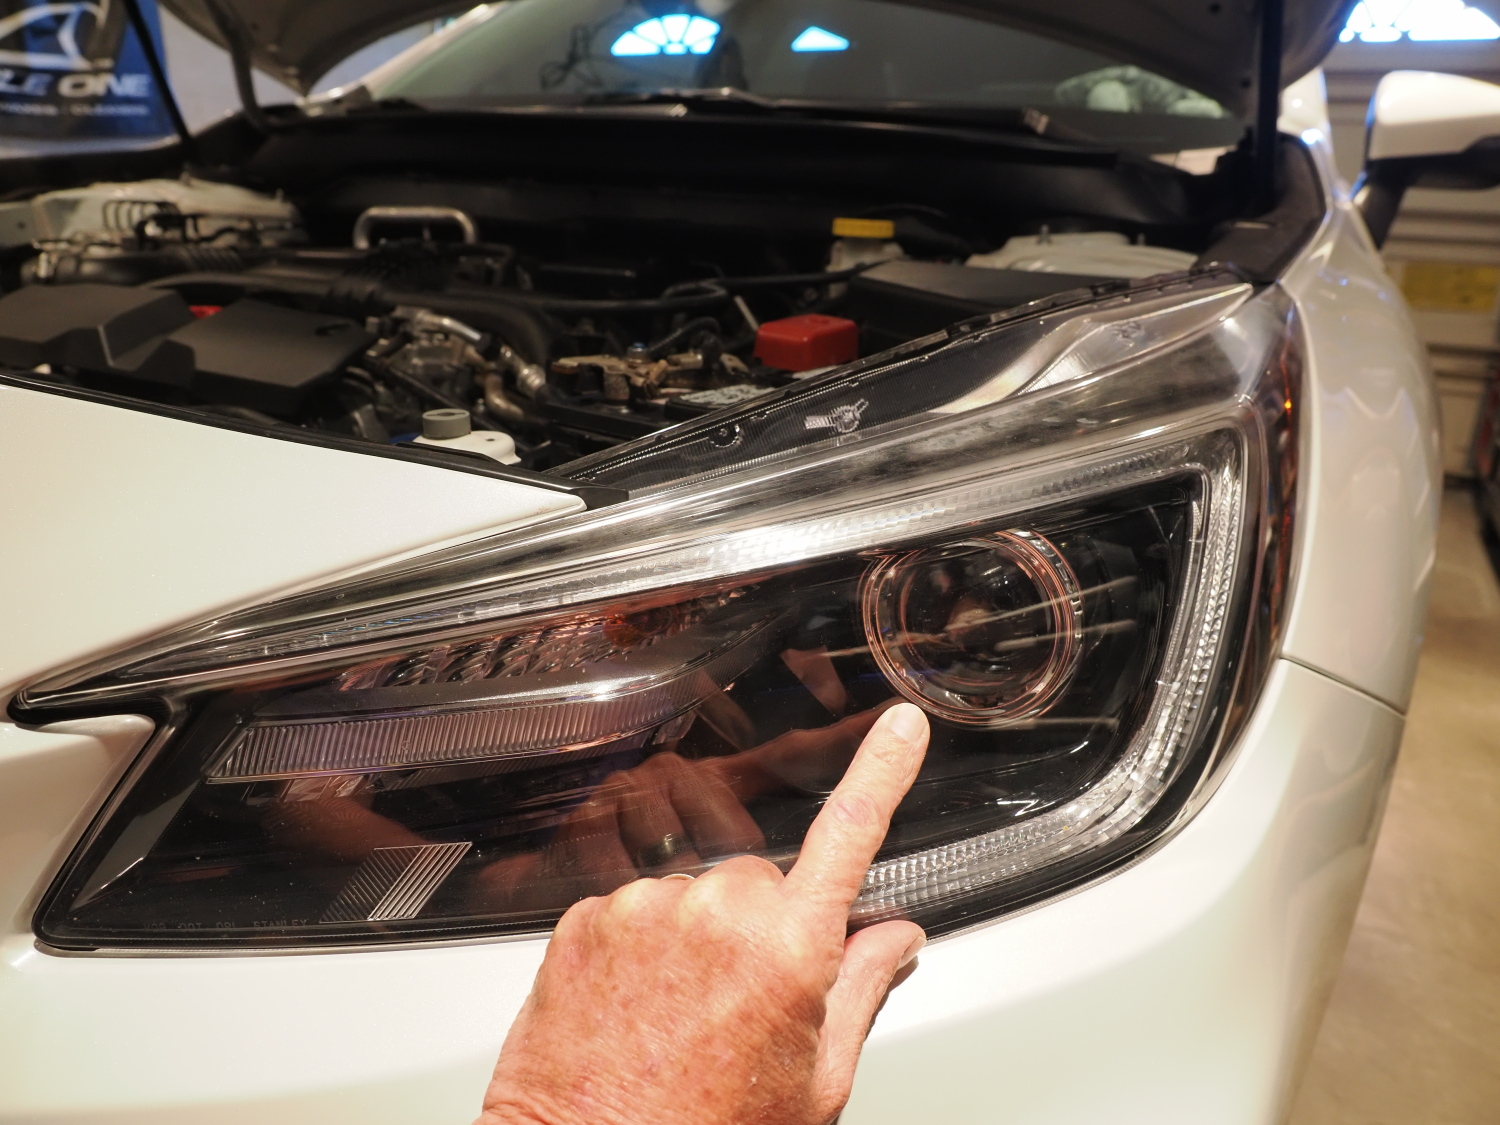
The center of the headlight lens is usually denoted by a faint mark.
Ensure the fuel tank is full, and remove any unnecessary weight from the trunk. You want the ride height to be at the “normal” level.
Now, follow these steps:
- Park the vehicle about two feet away, perpendicular to the wall.
- Use a towel or piece of cardboard to temporarily block the light from one headlight while marking the spot for the other.
- Turn on the headlights. Ensure that it’s the low beam.
It’s time to make markings to show where the light is shining. (You don’t want the headlights on for more than three minutes because the lenses could warp after they warm up.)
- Stick a length of masking tape (or another tape that easily sticks to the wall) from the top of the circle of light to the bottom where the beam is shining.
- Run a length of tape to mark the horizontal shape of the beam from one side of the light’s reach to the other.
- Repeat for the other headlight. On the wall, you should now have two crosses marking where the headlights focus and shine brightest.
- Now slowly back up the vehicle without turning the steering wheel. Stop when the headlights are 25 feet away from the wall.
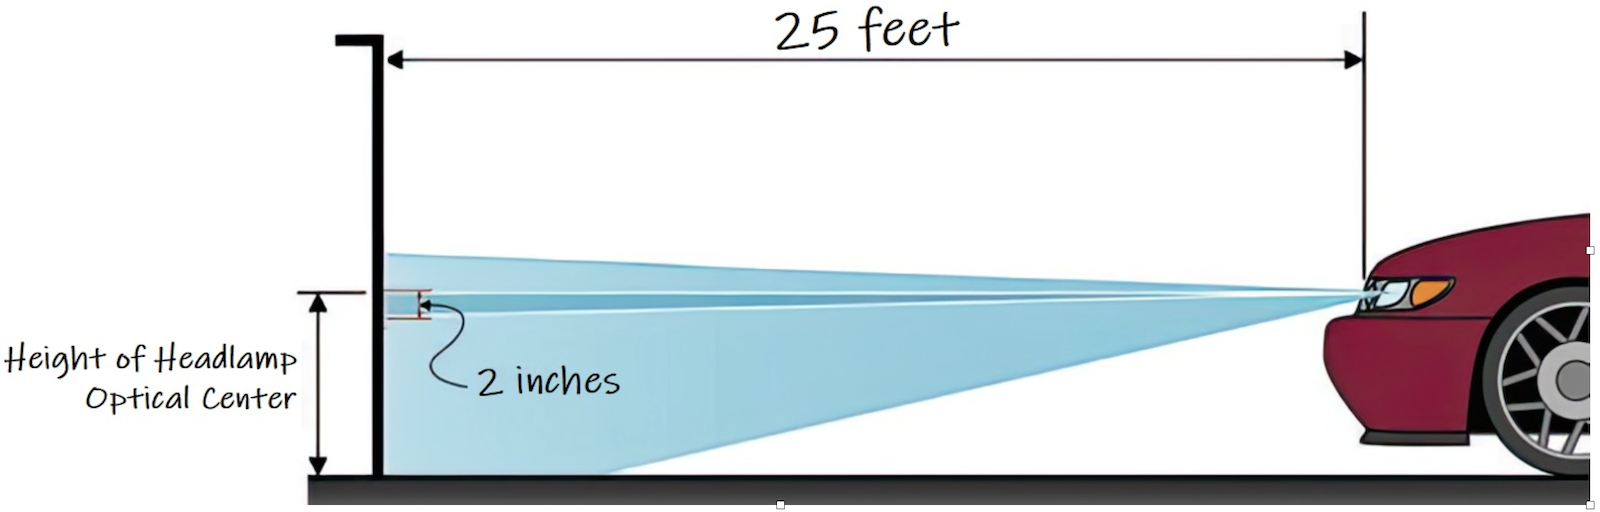
Illustration courtesy of the Federal Highway Administration
That’s the basics of how to aim car headlights. You now have your target for where the lights should hit when you’re on the road.
Finally, tweak the aim of your headlights. The goal is to adjust the light so the vertical center of the beam is shining directly at the center of the crossed tape. The light beam should focus two inches below the horizontal piece of tape.
How to Aim Car Headlights by Type

Old school headlamp adjuster screws
The adjustment procedure partly depends on the type of headlight.
Newer composite units with multiple bulbs in one housing. These headlights usually have a bubble level built into the lamp assembly. When adjusted, they move a parabolic reflector within the housing. These newer composite headlamps are usually only adjustable vertically, and they come with adjustment screws built into the unit.
You can only adjust the headlight height. Side-to-side adjustments aren’t possible on newer headlight systems with aerodynamic lights.
Older round and square sealed-beam headlamps. Each sealed-beam headlight bulb mounts in a cone-shaped bucket with horizontal and vertical adjuster screws. The horizontal screw is on the side of the headlight bucket closest to the center of the grille, and the vertical screw is usually on the top. The bucket’s two mounting points have a spring and a non-adjustable mount. The headlight bulb is held in the bucket by a thin aluminum frame with screws to change the bulb without changing the headlight adjustment.
Go slowly, making quarter-revolution turns of the adjustment screw, and evaluate the results. As you adjust for the low beams, the headlight will be properly aligned for the high beam.
Newer cars might have responsive headlights. These units move the headlight beam in response to your steering. So when you turn right, the roadway to the right receives more illumination. You can still adjust these headlights by following the steps above. After you learn how to make these adjustments, you can assess your headlights as needed. Even if you drive on rough roads, you should only need to adjust your headlights once a year.
Shop now for Sylvania headlight restoration kits